When doing research to write my Ultimate Guide to All Inpaint Settings, I noticed there is quite a lot of misinformation about what what the different Masked Content options do under Stable Diffusion’s InPaint UI. To help clear things up, I’ve put together these visual aids to help people understand what Stable Diffusion does when you select these options, and how you can use them to get the AI generated images you want.
What are the InPaint Masked Content options?
Masked Content options can be found under the InPaint tab of the Stable Diffusion Web UI beneath the area where you can add your input image. The default value is “original”.
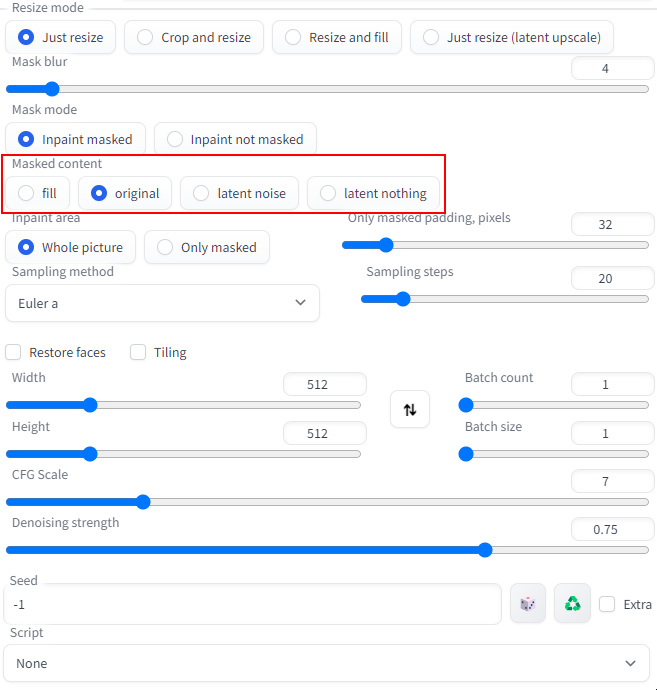
These options determine what Stable Diffusion will use at the beginning of its iterative image generation process, which will in turn affect the output result. Here is a quick summary of what these options do:
- Fill: The InPaint result will be generated off of an extremely blurred version of the input image.
- Original: The result will be generated based on the original content of the designated sections of the image to be altered. This is what you will want most of the time.
- Latent Noise: This option is good to select if you want the inpainted output to be very different from the original image, since the designated area will be inpainted based off of noise produced from the seed number. Basically this is starting from a blank slate.
- Latent Nothing: In this option, Stable Diffusion will fill in the designated area with a single solid color that is a blend of the colors from the surrounding pixels. This option is good to select if you want the InPaint to be extremely different from the original image but still maintain a vestige of its color palette.
To get a sense of what Stable Diffusion is doing for each of these options, we can look at the following visualizations, which were produced with a Denoising Strength of 0.0 and CFG Scale of 10 from Seed 3946908895 using the Euler A Sampling Method to Emma Watson’s face. For this study, we also turned off the Restore Faces option in InPaint.
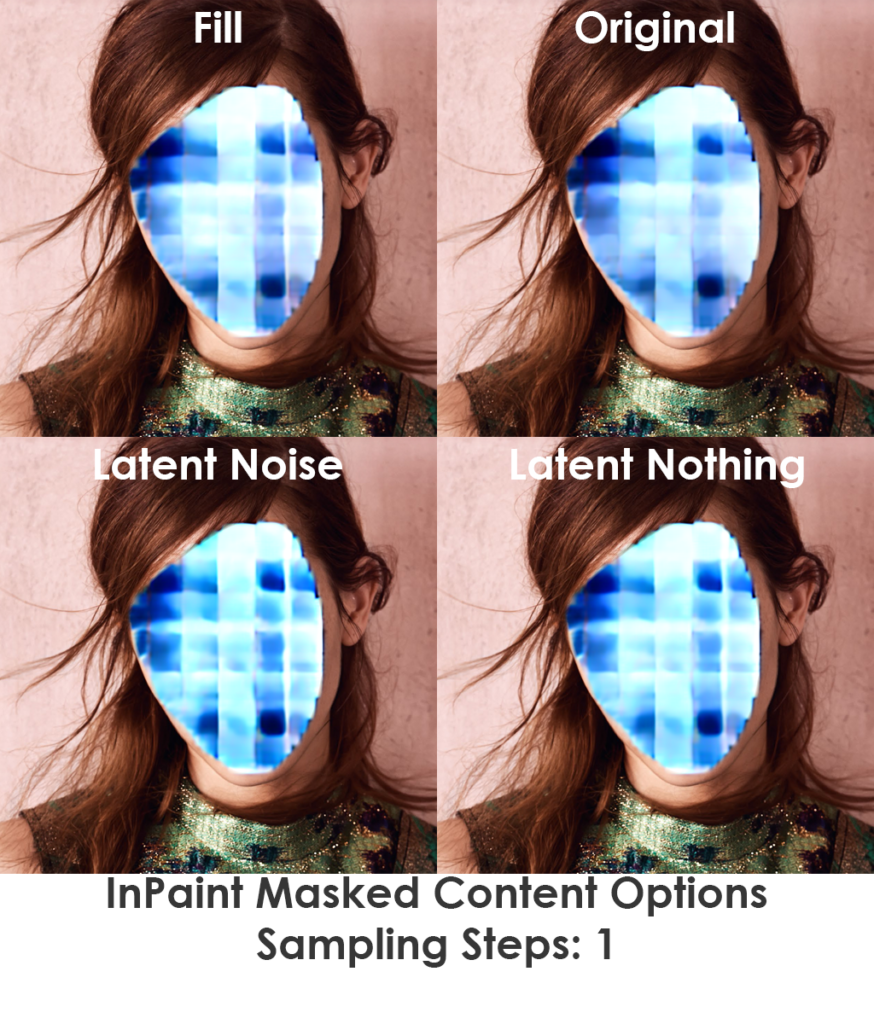
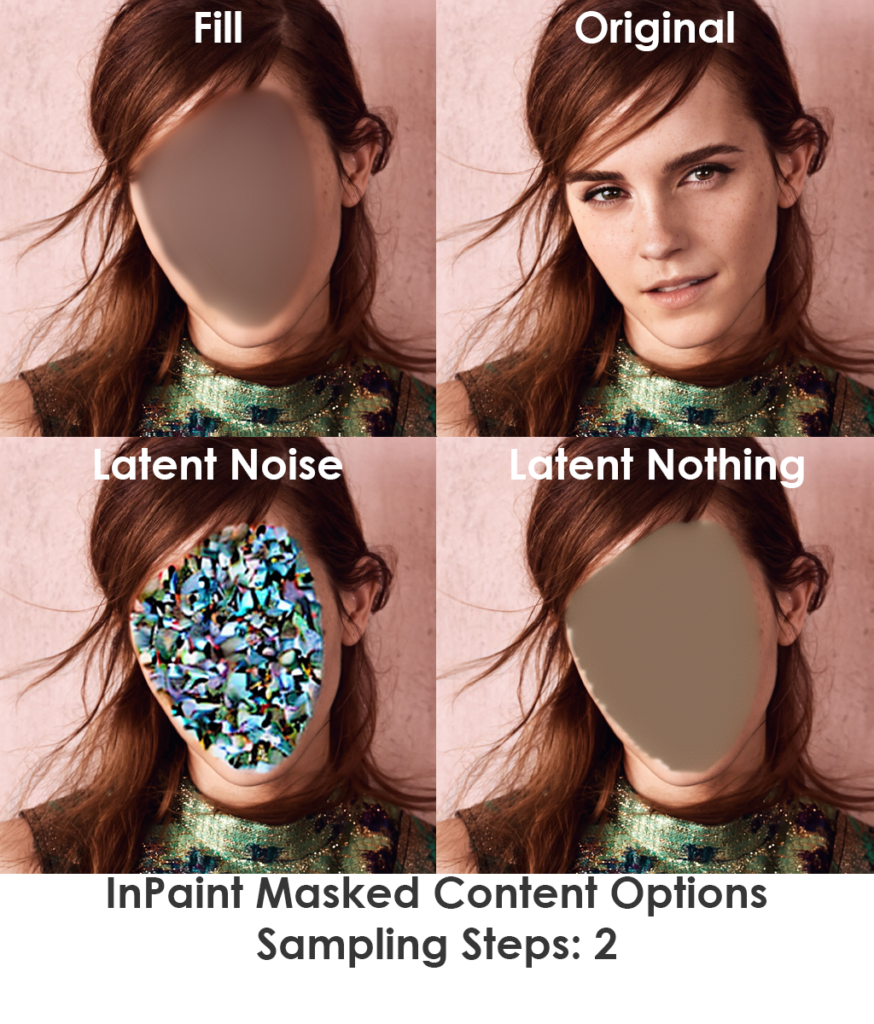
When sampling steps are set to just 1, we can see that Stable Diffusion begins to initialize the generation process from the seed in a similar manner regardless of which Masked Content option is selected. At the second sampling step, Stable Diffusion then applies the masked content.
Effect of Masked Content Options on InPaint Output Images
With the above, you hopefully now have a good idea of what the Masked Content options are in Stable Diffusion. The next logical question then becomes: how do I use Masked Content to get the AI generated images I want? To answer that, let’s use all of the same settings as the images above, but increase the sampling steps to 80. I also entered a text prompt to transform Emma Watson’s face into a 2D black and white checker pattern. Since the human mind is very good at distinguishing irregularities in both human faces and simple repeating geometric patterns, these two inputs seemed like a logical method for discerning the differences in color and composition between the output images.
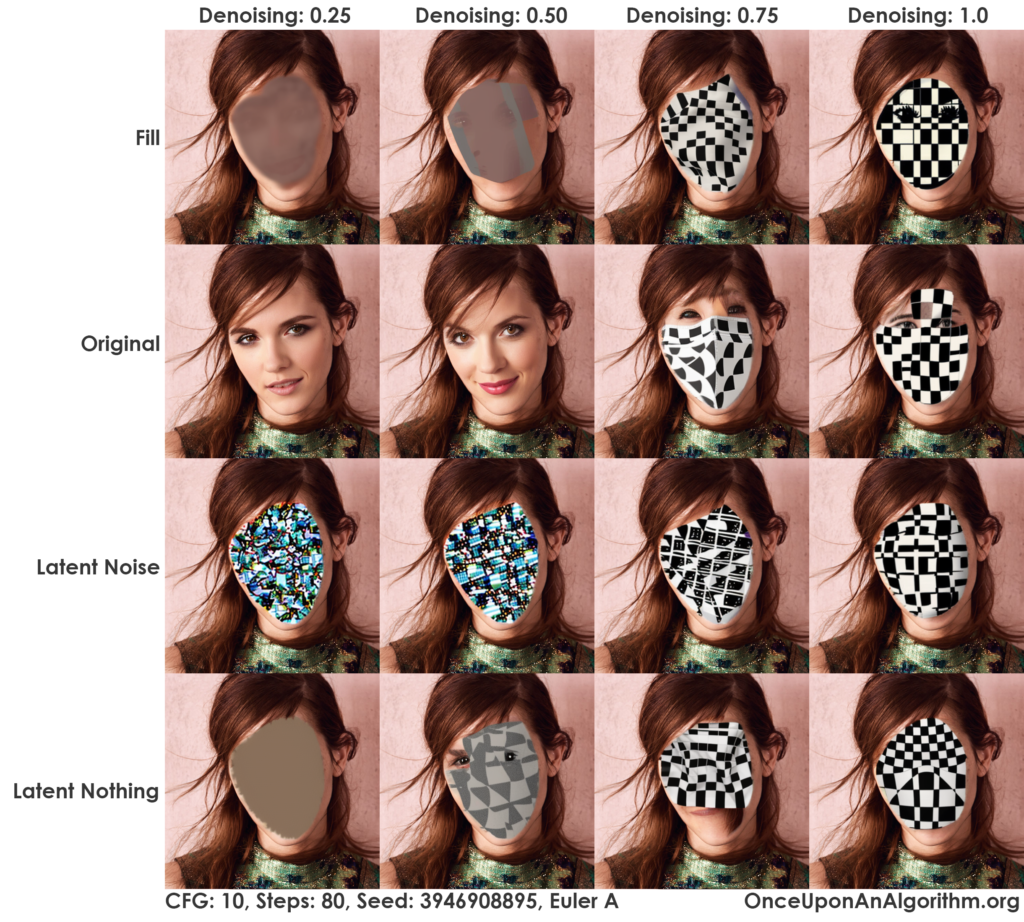
To help interpret the above, we must remember that Denoising Strength is the amount of noise that Stable Diffusion adds to an input image to then iteratively resolve it into an output image that matches the text prompt. Higher Denoising Strength increases variation and reduces the influence of your input image on your output image, which makes high values useful for significant modifications like turning Emma Watson’s face into a 2d black and white checker pattern.
From the above X/Y plot that charts different Mask Options against increasing Denoising Strength, we can observe the following general trends:
- Original is best for minor modifications that won’t change the input images composition. For significant changes, using “original” might not get you the result you want with InPainting, even with high Denoising Strength
- Fill retains a faint trace of the input image even at high Denoising Strength. This setting could be used if you want to give SD significant freedom while still retaining some vestige of the input image.
- Latent noise is what should be used if you want to completely blow out masked areas so that the output has little relation to the input image’s composition or color.
- Latent nothing is what should be used if you want to completely blow out the inpainted sections so that the output has no relation to the input’s composition but has some minor vestige of the masked area’s color palette. That statement is a little less obvious in this particular study using Emma Watson, but has been my anecdotal observation from other image generations.
Start Playing With InPaint Masked Content Options in Stable Diffusion
If you want to see how adjusting the masked content options will improve your AI generated images in Stable Diffusion, here are a few options to get you quickly started without having to download and install it yourself:
- Play with an online demo of the Stable Diffusion Web UI.
- Run your own instance of Stable Diffusion on a GPU cloud with minimal setup at RunPod.io.
