When doing research to write my Ultimate Guide to All Inpaint Settings, I noticed there is quite a lot of misinformation and confusion over what denoising strength actually does. To help clear things up, I’ve put together these visual aids to help people understand what Stable Diffusion does for different Denoising Strength values, and how you can use it to get the AI generated images you want.
What is Denoising Strength?
When a user asks Stable Diffusion to generate an output from an input image, whether that is through image-to-image (img2img) or InPaint, it initiates this process by adding noise to that input based on a seed. The amount of noise it adds is controlled by Denoising Strength, which can be a minimum of 0 and a maximum of 1.
- A Denoising Strength value of 0 will add zero noise, so your output will look exactly like your input
- A Denoising Strength value of 1 will completely replace your input with noise
The practical implication of this setting is that Denoising Strength helps to determine how closely your output image will be influenced by your input image. You can see this principle at play in the following X/Y plot that charts Denoising Strength against Sampling Steps for an image of Emma Watson that gets transformed via img2img into a 2D black and white checker pattern.

In the X/Y plot, you can see that the image of Emma Watson remains completely unchanged if Denoising Strength is set to 0, regardless of the number of sampling steps. When sampling steps are set to only 1, you can get a close visual representation of the noise that Stable Diffusion adds to the input image as Denoising Strength increases. As the values for both variables change, we can conclude the following:
- Lower Denoising Strength will make your generated images look similar to your input image, and therefore low values can be useful if you only want to make small modifications
- Higher Denoising Strength increases variation and reduces the influence of your input image on your output image, which makes high values useful for significant modifications.
To further understand this X/Y plot, you need to know that sampling steps are the iterations Stable Diffusion runs to go from random noise to a recognizable image based on the text prompt. When we set the sampling step count to a very low number, we can get an idea of the amount of noise that Denoising Strength introduces to the input image. As sampling step count increases, we can see how Stable Diffusion resolves that noise to produce an image that matches the text prompt based on the CFG Scale (up to a certain point).
Start Playing With Denoising Strength in Stable Diffusion
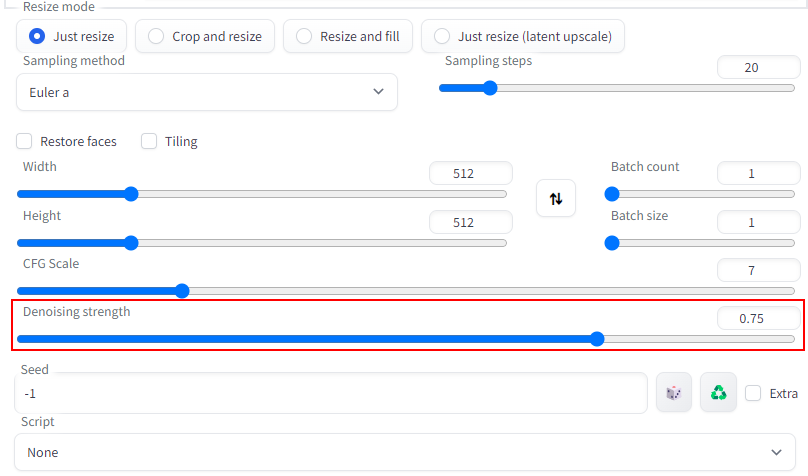
The denoising strength setting can be found under the img2img and InPaint tabs in the Stable Diffusion Web UI beneath the area where you can add your input image. The default value is 0.75.
If you want to see how adjusting denoising strength in Stable Diffusion will improve your AI generated images using img2img and InPaint, here are a few options to get you quickly started without having to download and install it yourself:
- Play with an online demo of the Stable Diffusion Web UI.
- Run your own instance of Stable Diffusion on a GPU cloud with minimal setup at RunPod.io.
